Friday, May 3, 2013

Week in Review 2013 - 5/03


Remember how "Canyon" looked before it was painted?
Read further to see how much it has changed.
I’m back! For those of you who read my blog regularly and thoroughly you may have noticed that I had a planned two week gap between studio progress recaps. The reason was a scheduled trip to the southwest that finished up in Santa Fe, New Mexico for the SAQA conference. If you are interested in art quilts than SAQA is the organization for you. It includes over 3,200 international members, mostly art quilters, but also patrons, gallery owners, business owners and students. It is because I joined SAQA’s Vision Project and chose as my personal project to spend 120 days in my studio for the 2012 – 2013 fiscal year that I am so focused on production in my blog.

Tips, Thoughts and Techniques

I wasn’t the only one in Santa Fe. I discovered my Craftsy.com painting teacher, Annette Kennedy was an attendee as well. She graciously chatted with me on several occasions. I took a seminar lead by Carol Ann Waugh on what is required to become a professional art quilter. Outstanding! Carol is another one of Craftsy.com’s teachers. I love her method of how she finishes her art quilts and plan to use it when appropriate. Carol demos her rattail finishing technique on YouTube.

It is always difficult for me to transition back to a disciplined workweek after an absence from my home. Nevertheless I did ease my way back into my studio. By my fourth day back I was in synch again. Just how much in synch can be determined by reviewing my plans for the week against what was accomplished.

1) Pictorial Painting

a) Continue to watch the portion of the lesson that demos how to paint the Canyon piece. – Done!

b) Finish painting "Canyon." – Done!

This week "Canyon" received some plants and more
definition to the road.


Check out the plants in the desert, particularly their shadows. I have always struggled figuring out how to include shadows in my artwork. These shadows work for me. Yeah!

2) Express Your Love

a) Do whatever assignment LeahDay comes up with next. – Done!

All that is left is the body!
"Express Your Love" is designed by Leah Day and executed by
Gwyned Trefethen, who selected the thread and what stitches
to use where.

Actually I did two assignments. I did one assignment for the week that I was away and then this week’s assignments. Both involved free motion spirals. The first was a combination of spirals and circuit board. The second was simply spirals as a filler. I love free motion quilting spirals. They flow naturally through my muscle memory. However, circuit board does not. So, I found alternating between executing a spiral and then a circuit board awkward.

The circuit board with spirals free motion quilting is
featured in the lower of the two purple ribbons. The
middle turquoise ribbon is done in spirals only.
Click on the image to see an enlarged version.

3) Adoration (Shooting for a deadline of June 1, 2013

a) Cut the backing and batting for Adoration. – Done!
b) Prepare the quilt sandwich. – Not done.
c) Select the quilting threads. – Not done.
d) Start quilting. – Not done.

This is a detail from "Adoration" after I painted in the eyes of my grandson.

I am really, REALLY struggling with this piece.  I made several “rookie” mistakes when assembling the pieces. The orientation lines are visible through the lighter fabric as is the edge of the dark blue background. Actually, I had tried to use lighter orientation lines and use markers that could be washed out, but I just couldn’t see them sufficiently. Once I got the marks dark enough to see to be useful, they are too visible. I am hoping that by adding paint and quilting these problems may resolve or at least be much less obvious.

What I did do is start the painting with my grandson’s eyes. I will add a dab of highlighting to the eyes next week.

4) Bonus project. Signature Experimentation

For years I have struggled with how to sign my artwork. Should I use my full name? First name only? My initials? Some artistic rendering of my initials? What about the date? While wandering one of the galleries in Santa Fe I came upon a signature that I liked that incorporated the artist’s initials and date. I played around some first on paper and finally created this. My addition was to frame the signature as well. I am not totally satisfied, but do feel I am to something.

My first experiment on how to sign my artwork.


There are so many enticing opportunities for me to apply for where my work can be shown. What holds me back now is having enough work submit. Therefore, I am determined to buckle down and create. Here is what I plan on achieving for the week ending May 10, 2013:

1) Pictorial Painting

a) Watch the lesson that demos how to quilt the Canyon piece.

b) Quilt "Canyon."

2) Express Your Love

a) Do whatever assignment Leah Day comes up with next.

3) Adoration (Shooting for a deadline of June 1, 2013

a) Paint the shadows, highlights and fine details necessary to bring the piece to life.

b) Sandwich the quilt.

4) Signature experimentation

a) Design a new signature motif.

5) Plan the next art piece.

Friday, April 19, 2013

Week in Review 2013 - 4/19


Any guesses for why I chose to gather these fabrics together?
 Tips, Techniques and Thoughts:

This week my thoughts have been with my hometown, Boston. I was raised in Lexington, MA.  A year after I married, my husband and I bought a home in Sherborn, MA, a small suburb of Boston. We lived there for 34 years. For all but one of those years we went out in frigid weather, balmy weather and rainy weather to watch the Boston Marathon from its halfway point in Wellesley, MA, where Wellesley College is located.

My children’s sport of choice was swimming, not running. It was on their US swim team that my son and his wife met at ages 11 and 12. My daughter-in-law is the Chief Resident of Family Practitioners at U Mass Medical and is particularly interested in sports medicine. That is why she has volunteered to work at the finish line medical tent for the Boston Marathon for the last three years. She was there caring for the runners when the bombs went off. Fortunately she wasn’t hurt. I am grateful for her while also keeping the victims, their families and friends close to my heart.

It is time to be accountable and see how close my plan for the week actually jived with what I did for the week ending April 19, 2013.

1) Pictorial Painting

"Canyon" at the beginning of the week.

a) Continue to watch the portion of the lesson that demos how to paint the Canyon piece. – Done!


"Canyon" at the end of the week.

b) Finish painting "Canyon." – I worked on but didn’t finish "Canyon." 

I'm rather proud of the painting this week. I painted the shade and highlights on the ground sections. My fabric selection varies considerably from the teacher, Annette Kennedy. This means that I had to figure out how to blend the paint to suit my fabric. For once I managed something subtle AND visible. The result is more natural looking. There just may be hope.

2) Express Your Love 

 Do whatever assignment Leah Day comes up with next. – Done!

OK, I did one of the assignments. The assignment I didn’t do was the follow-up to Trapplique, which I already know how to do. The second assignment was to familiarize yourself with how to create words with the alphabet program that comes on most sewing machines these days.

I "signed" Express Your Love using my Bernina's
programable alphabet.
I have a Bernina 1260. This is a vintage Bernina pre computerization. This assignment was one of the few times when I wish I had an upgrade. In order to stitch words using my Bernina 1260’s alphabet I have to create a program by selecting each letter, then selecting the number of times I want that letter to appear in a row. There is no panel showing you what you selected. Nor can you delete the last entry if you make a mistake. I finally managed to enter my initials and the year. I tested the entry and then when I was satisfied tried it on Express Your Love. It was a disaster. I picked out the initials (1 hour) and added them again, but forgot to press the “double” stitch button the second time around. Since this is a practice piece, I have decided it is close enough.

3) Reflection 

a) Add Reflection to my website. – Done!


4) Adoration (Shooting for a deadline of June 1, 2013)

The original photo inspiration for Adoration
 a) Mark the background fabric as a guide for where to place the appliqué pieces. – Done!


The guide for cutting and placing the appliqué pieces for Adoration.

b) Start cutting and positioning the appliqué pieces. – Done! 

As you can see I did more than start, I actually finished this.

"Adoration" after the pieces have been cut, positioned and
affixed to the background guide. It will finish at 35" - 36" square.


This past week went relatively well. Check back on May 3, 2013 to see whether I follow my plan or take a detour or two. My intention is to do the following:

1) Pictorial Painting

a) Continue to watch the portion of the lesson that demos how to paint the Canyon piece.

b) Finish painting "Canyon."

2) Express Your Love

a) Do whatever assignment Leah Day comes up with next.

3) Adoration (Shooting for a deadline of June 1, 2013

a) Cut the backing and batting for Adoration.
b) Prepare the quilt sandwich.
c) Select the quilting threads.
d) Start quilting.


Friday, April 12, 2013

Week in Review 2013 - 04/12

Tips, Techniques and Thoughts...

I have been fascinated by the transformation of one object to another object every since I witnessed my childhood babysitter knit a doll’s blanket from a long strand of yarn. The transformation that takes place from the germ of an idea for what to create next to the end result is what motivates me during the process of creating a piece of art. From the comments I receive from those of you who follow my blog, it seems transformation intrigues you, too. That is why for the triple T section (Tips, Techniques and Thoughts) I am recommending a novel, you may have already read and a documentary you probably missed.

The novel is a piece of historical fiction about how “Girl with a Pearl Earring” by Vermeer was created. The author is Tracy Chevalier.

Isn't the light and shadow outstanding
on "Girl with a Pearl Earring?"

One of the best gifts I gave myself was a subscription to Netflix. I have “discovered” more great films this way. The most recent was “Note by Note: the making of Steinway L1305." I worried that this would be exactly what the title said, the step by step making of a Steinway piano. It is so much more. Each step of the process acts like a chapter heading. What makes Steinways unique is that each one is handcrafted and hand tuned. What was new to me was how each piano and has a feel and therefore concert pianists request specific pianos by number for their concerts. I couldn’t help but draw a parallel between a pianist and his affinity for a certain piano with quilters and their connection with their sewing machines.

This past week has been tough for several reasons. I slogged away, despite the setbacks. Here is how my plan and my achievements aligned for the week ending April 12, 2013.

1) Pictorial Painting

"Canyon" has it looked last week.

a) Continue to watch the portion of the lesson that demos how to paint the Canyon piece. - Done

"Canyon" after painting the background mountains."

b) Finish painting Canyon. – Partially done. I finished painting the background mountains. 

2) Express Your Love

The Hot Hot Spiral ribbon is the lowest one. The quilting pattern
looks like tongues of flame alternating with spirals. Hence, it's name.

a) Finish quilting Hot Hot Spiral Ribbon – Done.
b) Do a ribbon in Loopy Doopy Sprial – Done.


That's Loopy Doopy Spiral, front and center. This time loops
alternate with the spirals.
c) Do whatever assignment Leah comes up with next.

The next assignment was to create sections of the quilt using a technique that Leah’s friend named Trapplique. The point of Trapplique is to create pre-quilted sections for a quilt that are appliquéd on top of the quilt. The reason Leah is using Trapplique on her quilt is that she was dissatisfied with the way her ribbons came out. I am happy with my ribbons. If the technique were unfamiliar to me I would test-drive it on something else. However, this is something I have used for years when I wanted to push a section of the quilt into the foreground. I used it to add the tree, leaves and cardinal in my  quilt, “Tree Serenade,” for instance.

"Tree Serenade" 

What I did choose to do, in order to have my ribbons stand out more from the quilt, is satin stitch around the edge of each completed ribbon with the same variegated white through gray mist thread I used in the hair section.

The full view of "Express Your Love" (design by Leah Day,
choice of stitches, threads and execution by Gwyned Trefethen)
allows you to see how the ribbons stand out now that they have
been outlined in satin stitch with a variegated white to mist gray thread.

d) Bonus – I used nano stitching to create the eye.

3) Reflection (Absolute deadline April 23, 2013)

a) Make and attach the sleeve. - Done
b) Make and attach the label. - Done
c) Add Reflection to my website. – Couldn’t do.

Wednesdays are my business days. That is when I review outstanding calls for entry, look for new ones and complete some. I also update my website with new events and quilts. This Wednesday we had an ice storm that knocked out power for most of the day. I did manage to handle calls for entry. I just didn’t have time before calling it a day to update my website. I’ll do that this weekend.

d) Submit Reflection for consideration in "The Eye and the Needle," a SAQA IL/WI exhibition. – Done

4) Adoration (Shooting for a deadline of June 1, 2013)
a) Mark the background fabric as a guide for where to place the appliqué pieces. 

Done, but it was a major struggle. I just couldn’t distinguish the obvious sections to mark, even using a very fancy light table at my husband’s lab. I will try again next week.

b) Start cutting and positioning the appliqué pieces. – Without an accurate guide this couldn’t be done.

Never someone to let a few setbacks completely derail me, I have plans for next week. Here is what I hope to accomplish by April 19, 2013.

1) Pictorial Painting

a) Continue to watch the portion of the lesson that demos how to paint the Canyon piece.

b) Finish painting "Canyon."

2) Express Your Love

a) Do whatever assignment Leah comes up with next.

3) Reflection 

a) Add Reflection to my website.

4) Adoration (Shooting for a deadline of June 1, 2013)
a) Mark the background fabric as a guide for where to place the appliqué pieces.
b) Start cutting and positioning the appliqué pieces.


Friday, April 5, 2013

Week in Review 2013 - 04/05

Express Your Love - a preview of what is to come. The design
and quilting patterns for this piece come from Leah Day. What
to quilt where,  with what thread and quilting are by
Gwyned Trefethen.

I'm back. That is I have returned from a multi generational family vacation on Treasure Island, FL.  I find transitioning from home life to vacation and back difficult. I do best with routine. Vacation and returning from vacation with the inevitable backlog of things to attend results in difficulty focusing and a greater propensity to drift. The result was that I didn't manage my accustomed three full studio days this week. I did spend three partial days in the studio. Here is what I managed to accomplish.


1) Pictorial Painting

Canyon before any paint is applied.
a) Mark the fabric for painting. - Done!
b) Watch the portion of the lesson that demos how to paint the Canyon piece. - Done!
c) Bonus - I started painting.

Canyon after the foot hills have been painted.
2) Express Your Love

a) Do whatever assignment Leah comes up with next. - Done! 

Leah has gotten back in the groove of providing assignments. I managed to try my hand at two of her spiral variations. The first being Wiggle Wiggle Spiral and the second Hot Hot Spiral. I checked in with Leah this morning and see that there is yet another spiral pattern to explore. 

Close up from Express Your Love. The aqua ribbon has been
quilted using Hot Hot Spiral.


b) Finish quilting the hair. - Done!

Close up of the hair from Express Your Love. The design
Wiggle Wiggle Spiral was used in the upper of the two red rays.

Express your love was my primary focus this week. I am really wowed by how it is coming together. Leah's original line drawing and her quilting patterns produce a fascinating image. What is especially fun is to check out how Leah's other groupies are executing this same piece. 

3) Reflection (Absolute deadline April 23, 2013)

a) Finish stitching the facing. - Done!
b) Make and attach the sleeve. - Oops, could have done this.
c) Make and attach the label.
d) Add Reflection to my website.

I had forgotten when I assigned myself the finish work on Reflection that my husband (also my photographer) would be out of town. I wanted a "formal portrait" taken of Reflection to use for submissions to Calls for Entry, the quilt label and for my website. Not being able to move forward on Reflection I started planning my next quilt...

4) Adoration (Shooting for a deadline of June 1, 2013)

There is something about Madonna and Child paintings
with loving gaze and focused light that has appealed to me
since I saw my first one in a history of art book of my mother's.
This painting is Adoration by Correggio. 

a) Selected and cropped the image to use to guide the quilt.
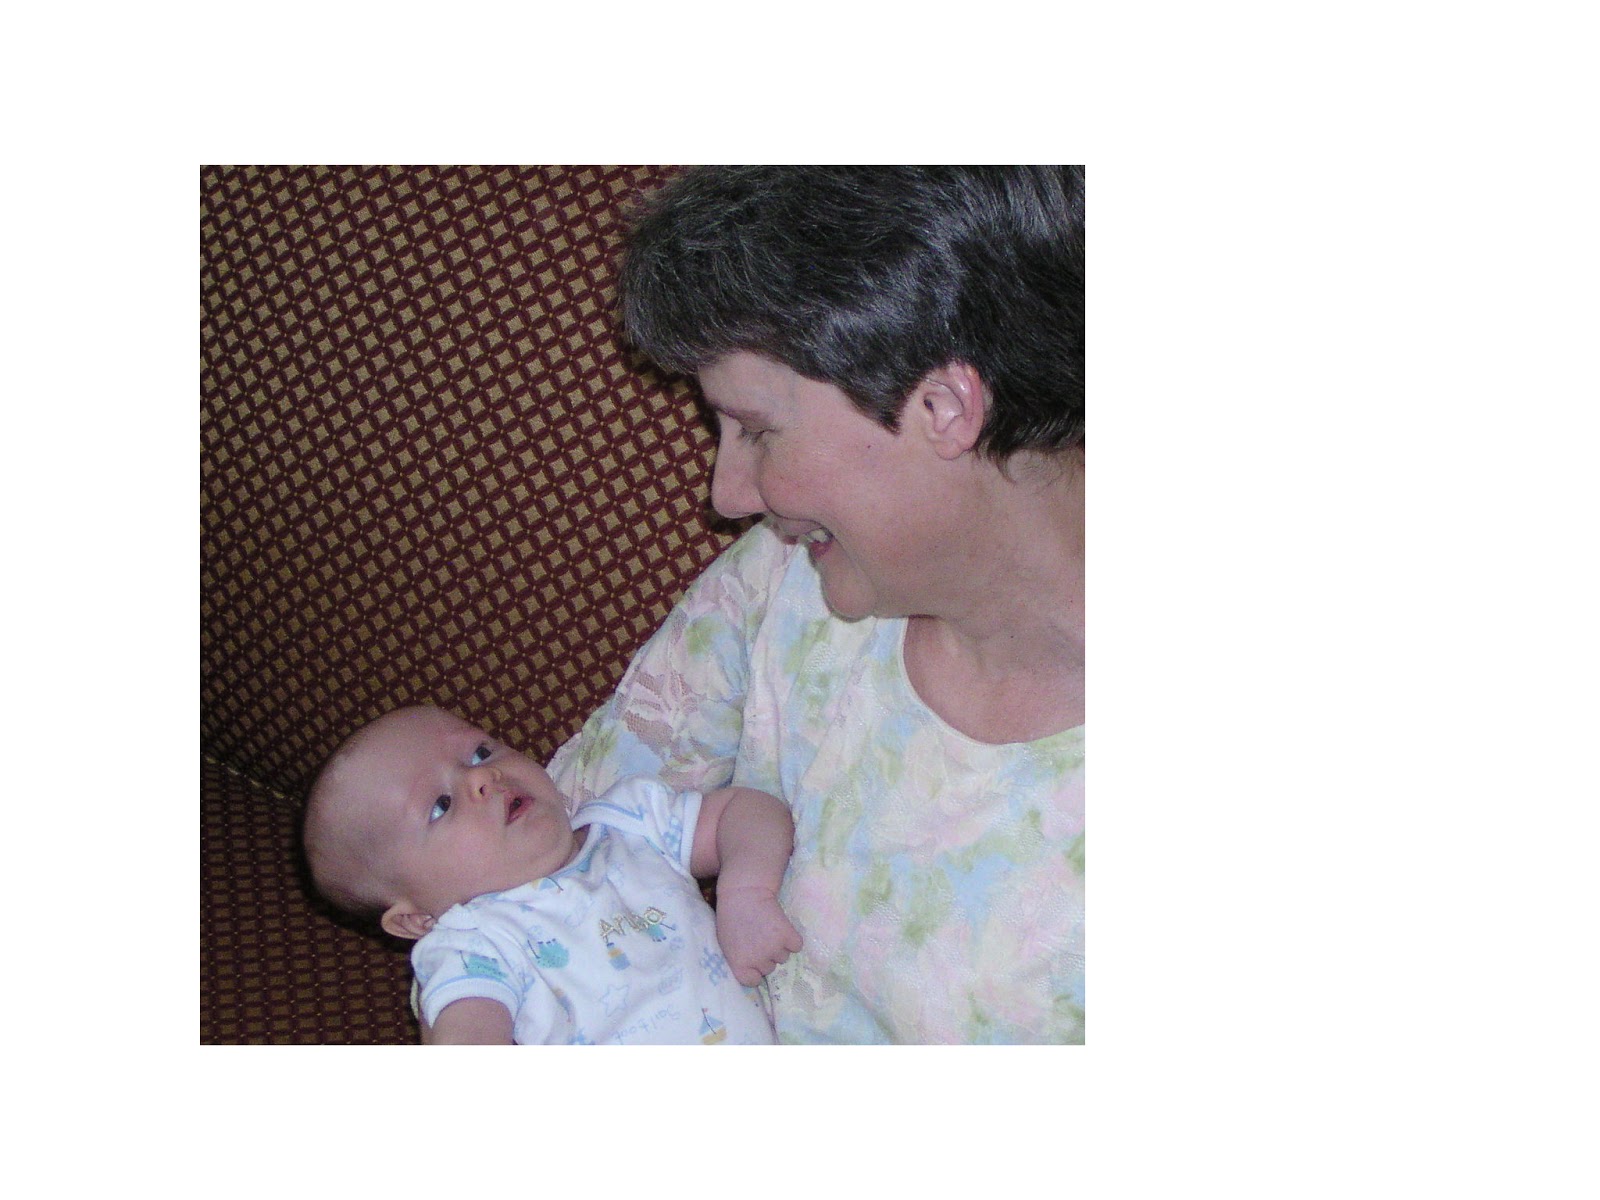
Yes, that is me gazing adoringly into the eyes of
my first grandchild. This is the image I am using
as a starting point for Adoration.


b) Created a traced line drawing of the image.
c) Used the line drawing to create a to scale pattern.
d) Selected the fabric.
e) Painted the fabric to be used in the grandmother's blouse.  


Hand painted fabric to be used as the base fabric for the blouse.

Tips, Techniques and Thoughts...

An issue I have with fabric painting is that so many blends of paint must be created with various amounts of gel medium that may be needed later in the day, the next day or even next week. It is easier to create all the blends I need at once, but then the problem is how to store them since the left over paint resides solely in the dimples of my palette. I have found that by covering the palette with Press 'N Seal the paint lasts at least a week without drying out.

Clearly I have some catching up to do next week. This is what I plan on accomplishing between today and April 12.

1) Pictorial Painting

a) Continue to watch the portion of the lesson that demos how to paint the Canyon piece.
b) Finish painting Canyon.

2) Express Your Love

a) Finish quilting Hot Hot Spiral Ribbon
b) Do a ribbon in Loopy Doopy Sprial
b) Do whatever assignment Leah comes up with next.

3) Reflection (Absolute deadline April 23, 2013)

a Make and attach the sleeve.
b) Make and attach the label.
c) Add Reflection to my website.
d) Submit Reflection for consideration in "The Eye and the Needle," a SAQA IL/WI exhibition.

4) Adoration (Shooting for a deadline of June 1, 2013)

a) Mark the background fabric as a guide for where to place the appliqué pieces.
b) Start cutting and positioning the appliqué pieces.

Apology - recently Blogger has started to put a white background behind anything I cut and paste into a post. I have tried numerous fixes, but haven't found the right one yet. Please bare with me.

Wednesday, March 20, 2013

Week in Review 2013 - 03/22


Close enough is this week's mantra. I aim for 3 full studio days each week. There are times, like this week, due to foreseen circumstances, that I need to adjust my studio time. As of this posting I have managed 2 1/2 studio days this week. I may be able to squeak in the final 1/2 day. However my photographer (husband) won't be here to take photos of that half day progress. For this week, 2 1/2 days of change between postings is close enough.

Despite shorting my week by half a studio day, I did manage to meet all my goals, or at least came close enough. Here is how the week ending March 22 went:

1) Pictorial Painting
Pictorial Painting assignment #2 - Canyon

I am taking Pictorial Painting taught by Annette Kennedy through Craftsy.com. My attitude about taking classes is to experiment, enjoy the process and learn. What I create will never appear on my website, nor will it be eligible for exhibition. Therefore, I feel no need to "fix" issues. This is another case of close enough.

a) Select the fabric for Canyon. - Done!

If this were my design versus a class I would change out the ground fabric, probably using the same fabric but its backside. This way there would be a stronger contrast between the mountains and the ground. It isn't a problem on the right side, just the left side of the piece. I believe this will be less problematic once the piece is painted, since there is a thin dark line to painted exactly where the brown/mustard mountain meets the textured ground. For now, it is close enough.

b) Cut the fusible backing according to the templates. - Done!
c) Use the fusible templates to cut the fabric. - Done!

I even managed some bonus work. I laid out the fabric on my muslin backing and fused it in place.

2) Express Your Love

a) Do whatever assignment Leah comes up with next. - Done!

Detail from Express Your Love showing the ray done
in Zigzag Spiral.
The goal was to use a new filler pattern of Leah's that she titled Zigzag Spiral. This is actually two patterns, Zippling and Spiral combined. I opted to use it one of the rays. It is the most central red/variegated ray on the bottom of the image. The pattern combined with my color choice feels very southwestern or fiesta like to me. Perhaps that is because I am heading to the southwest soon, so it is on my mind.

b) Continue quilting the hair. - Done!

Detail from Express Your Love showing the hair
as it appears today. 

I added the thinner of the two white streaks, done in the Cat Hairball pattern and the farthest to the right Stacked Flame strand. This is better than close enough. I am luxuriating in such a rich mane of hair.

c) Finish the Iris Still Life by adding a sleeve. - Done!

3) Reflection (Absolute deadline April 23, 2013)

Detail from Reflection after the red branches
have been added.

a) Make and adhere the red branches to the quilt. - Done!

My original plan had been to make bias tubes from a luscious deep maroon fabric to form the branches. Then I would add detail through fabric clumps and french knots. However, even the skinniest of bias tubes was too thick. I scrapped that idea. Next I thought I would paint the branches. This was better, but I don't yet have the dexterity and knowledge of paint and brushes to achieve the thinning and thickening of each branch that I hoped for. I was wary about thread painting the branches. I feared the heavy stitching required might distort the quilt. However, I discovered the section to be thread painted is not extensive in area and that area if it is outline stitched before the thread painting is done the quilt really doesn't distort. There is no need for a hoop or stabilizer, since the quilt had already been quilted it acted as a stabilizer or basting would.

A second detail showing the lower branch from Reflection.
I couldn't resist showing a second detail image from Reflection. Thread painting the branches allowed me to apply two of my recent Leah Day lessons. I marked the swoop of the branches using assisted free motion quilting. I didn't mark how the branches would taper or where to add the buds and leaves. These I did by eyeball while running the machine. The thickest sections of the branches are done in Cat Hairball stitch.

c) Square up the quilt for finishing. - Done!

b) Make the binding.  - I opted to face Reflection versus binding it.

Reflection with 75% of the facing stitched down.

I have been mulling over whether to bind or face Reflection since I first started working on it. My instinct was to face it.  I have faced approximately five quilts before Reflection using a variety of "no fail" facing methods and have been disappointed with the results every single time. However, once I opted to thread paint the branches binding the quilt just didn't make visual sense. The branches need to appear as though they start somewhere off the quilt. If binding comes between the quilted branches and the implied start of the branches image would feel off. I thought I could continue to thread paint the binding after it was applied. My fear was that would flatten the binding noticeably under the branch "extensions."

How could I paint myself out of this corner? My plan was to research facing methods. Maybe there was a YouTube demo that would show me how to have more success.  I sat down at my computer to start researching and in one of those powerful moments of serendipity a fellow Visioning Project member had e-mailed me a link to her favorite facing method. I tried it and for a first attempt and am very satisfied. The corners don't look like dog ears, the quilt turns nicely to the back so that none of the facing is visible in the front and it even finishes nicely on the backside of the quilt.

Tips, Techniques and Thoughts...

It can be so tempting to take the easy way. I would have been much more comfortable binding Reflection. I have binding down and find it a pleasant respite after the challenge of designing and making a quilt. My muse started whispering, then speaking and finally shouting "this quilt MUST be faced." I am glad I listened.

If you are interested in giving this facing method a try it can be found on Susan Brubaker Knapp's website. Even if you don't want to try your hand at facing, drop by Knapp's website. Her quilts are outstanding.

I will be traveling next week and therefore not working in my studio. However, when I return I intend to pick up where I left off. Here is my plan for the week ending April 3:

1) Pictorial Painting

a) Mark the fabric for painting.
b) Watch the portion of the lesson that demos how to paint the Canyon piece.

2) Express Your Love

a) Do whatever assignment Leah comes up with next.
b) Finish quilting the hair.

3) Reflection (Absolute deadline April 23, 2013)

a) Finish stitching the facing.
b) Make and attach the sleeve.
c) Make and attach the label.
d) Add Reflection to my website.