Friday, March 15, 2013

Week in Review 2013 - 03/15

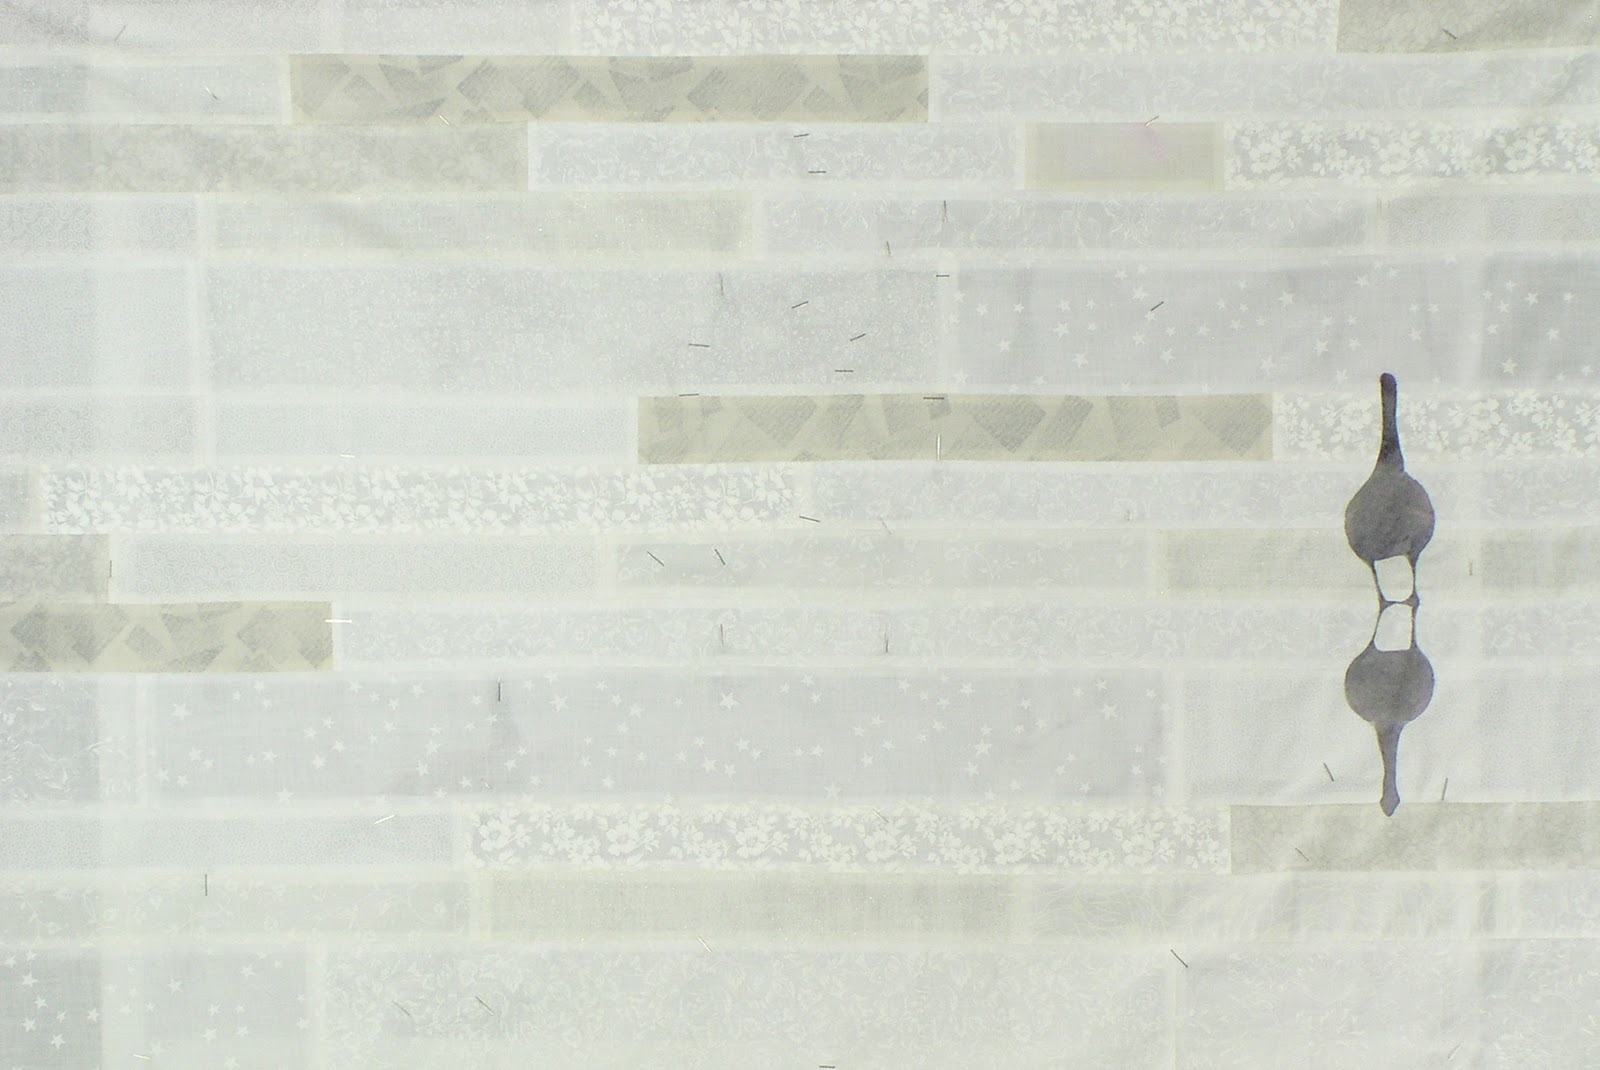
Detail from Reflection

Tips, Techniques and Thoughts...

Leah Day has been sharing her fears, insecurities and disappointments this week on her blog. It got me thinking how regular practice over years and decades helps to dampen these fears, insecurities and  disappointments. Why is this so? I would conjecture because over years one begins to see personal patterns of highs, lows and plateaus. Therefore, one develops confidence that mistakes can be rectified and lows don't last forever.

When I started quilting in 1988 the World Wide Web didn't exist. That didn't come into being for another 5 years. I learned about quilting through magazines and taking classes. Magazines were also my source for where to enter quilts. The first Call for Entry I submitted was in 2000 to the American Quilter's Society. Amazingly my entry was accepted. I was so excited and assumed it was such a fluke that I actually flew half way across the country just to see my quilt at AQS. My next Call for Entry also resulted in acceptance. Maybe my work was worthy after all. Then the next was rejected. I have no idea how many calls for entry I have completed since 2000, but I have a good sense that my work is NOT accepted more often than it is accepted. Not being accepted doesn't sting the way it used to. Why? Because I have a CV with a long list of all the exhibitions and publications I have been privileged to be part of.

It is rare that I don't have at least one or two or more quilts on view somewhere in the country and even occasionally outside of the country. Currently my work can be seen in Loveland, Colorado, two venues in Appleton, WI and in an on-line catalog as a runner up for an on-line exhibition.

Does this mean I plan on sitting back and relaxing? Of course not. Here is where I focused my attention last week.

Another detail from Reflections

1) Pictorial Painting

a) Watch the next lesson. - I started to watch the lesson for the second and final project. I opted to stop a few minutes in so that I could...

b) Begin the next lesson. - I did. I printed out the 3 different blue prints for the next project. These are poster sized and require overlapping and securing pages to get the full print. I now have the templates, layout and painting guides for the canyon piece ready to go.

2) Express Your Love

Detail featuring the hair from Express Your Love.

a) Do whatever assignment Leah comes up with next. - Done

The assignment was to use the filler stitch, Cat Hairball.

I am using three different patterns and three different threads
to create the hair. Left to right they are Stacked Flame Stitch in
a pale gray cotton thread, Channels and Paths in a variegated
white through brown cotton thread and Cat Hairball using
a variegated white through pale gray nylon.


b) Finish quilting the hair.

I made some progress with this. I did another lock in Channels and Paths and tried my hand with Cat Hairball. Cat Hairball is very, VERY time consuming. That single lock took me between 5 and 6 hours and used a full bobbin of Bottomline thread.


Express Your Love as it looks today.

c) Finish the Iris Still Life by binding it and adding a sleeve. - 50% done.


The binding is done, but I still need to make and add the sleeve. Selecting a binding wasn't easy for this piece. Since I dyed the quilt and didn't have the presence of mind to dye additional fabric to use as the binding, I didn't have matching fabric. I had at least four fabrics in my stash of purples that I thought would work. I found that the light and mid value choices were dull. I went for the darkest one. My preference would have been to have dyed matching fabric at the time I dyed the quilt. 

3) Reflection (Absolute deadline April 23, 2013)

a) Finish quilting the ice and water surrounding the geese. - Done!

Reflection after the background quilting has been completed.
This is where I spent the majority of my studio time this week. It took nearly two full studio days to do this. I had underestimated the time. I thought because it was a simple all over pattern and that I was doing it in a small, but not micro scale it would go faster than it did. It was worth it though. I like the pattern I invented to give a sense of water on ice.

b) Start work on the red branches. - Done.

OK, it depends on your definition of start. I have selected the fabric. I have ordered and received the bias tube pressing bars. I have cut the fabric and sewn the first seam needed to make Mobius bias strips. If you look closely at the various images of Reflections in this post you can see pencil lines where the branches will be.


Another detail from Reflections

I've been talking about getting those red branches added for several weeks now. Next week for sure! Of course I won't stop there. Here is my game plan for the week ending March 22:

1) Pictorial Painting

a) Select the fabric for Canyon.
b) Cut the fusible backing according to the templates.
c) Use the fusible to cut the fabric.

2) Express Your Love

a) Do whatever assignment Leah comes up with next.

b) Continue quilting the hair.

c) Finish the Iris Still Life by adding a sleeve.

3) Reflection (Absolute deadline April 23, 2013)

a) Make and adhere the red branches to the quilt.

b) Make the binding.

c) Square up the quilt for finishing.


Friday, March 8, 2013

Week In Review 2013 - 03/08

I have been a free motion quilting fiend this past week. Often my projects are at different stages, so that I might be designing one quilt, piecing another, quilting a third and perhaps doing handwork on a fourth. However, this week all three of my projects involved free motion quilting at some point in their progress.

Was free motion quilting what I had in mind for the week ending March 8? Here is my plan matched up with what I actually did.


1) Pictorial Painting

a) Watch the next lesson. - Done

Annette Kennedy gave a lecture on depth and dimension using her photographs and quilts as examples. There were no assignments for this lesson.

b) Begin the next lesson. - Done or not done. There was nothing to do.


2) Express Your Love

Work begins on the goddess's hair.
The design, called Express Your Love, is by Leah Day.

a) Do whatever assignment Leah comes up with next. - Done

Last week I said that Leah hadn't provided us with a lesson. I spoke to soon. She did demo a variation on Flame Stitch that she dubbed Stacked Flame Stitch. This week she shared how to do another filler design called Channels and Paths. I chose to do use both this patterns in my goddess's hair. Since I see myself as my goddess, I decided to use thread similar to my own gray, brown, white, dark brown, slightly streaked hair. Therefore, I did the Stacked Flame Stitch in a pale gray and the Channels and Paths is variegated brown, golden honey and white.

A closer look at the goddess's hair. 

b) Finish quilting Iris Still Life. - Done

This a whole cloth 16" square quilt. The fabric is a single
hand dyed fuchsia. What a difference varying  the thread
color and density of the quilting makes!

Last week I quilted the rays done in McTavishing.  This
week I decided to use a portion of the center image -
a single iris,  placed in alternate rays.  Note how this single
change helps to both draw your eye in and pull it out.

3) Reflection (Absolute deadline April 23, 2013)

The brown threads across the background are the
basting threads. They are removed as I come to them. I find
this method of basting results in the least distortion of the quilt
that is a natural result of quilting.

a) Add the first layer of batting needed to trapunto the geese and trim it. - Done

b) Add the second layer of batting and backing, in other words make the quilt sandwich. - Done

c) Start quilting the ice and water surrounding the geese. - Done

Close up showing the effect of the trapunto, reverse
applique and free motion quilting.


This week just might set a record. I don't believe I have ever completed 100% of what I planned on doing. Much of the credit is due to Leah. I have learned so much about free motion quilting over the past 15 months that I can do it for hours. It has become as second nature to me as piecing. Proof positive that practice makes a difference.

Tips, Techniques and Thoughts...

"Reflection" a.ka. the geese quilt, is a favorite among readers of the blog. It has generated a few questions about how I did the reverse appliqué. The difference between appliqué and reverse appliqué is that the first is pieced on the front/right side of the quilt, while the latter is pieced to the back side of the quilt and the front of the quilt is then cut away revealing the piece. Think of a picture frame or window. Since the front is cut away there are raw edges to deal with. My favorite method, and the one I used to here to cope with raw edges, is to satin stitch around the appliqué. I find it helpful to set my machine at a slightly longer length between stitches than recommended. This keeps the satin stitch from being so dense that it won't flow under the machine's pressure foot. I also change the width to about half the default setting. Ultimately, the key is to set the satin stitch in such a way that it covers the raw edge and doesn't detract from the design. Thread choice is key, too. I used a VERY pale lavender thread. White would have "popped."


Nothing like a solid week of work to leave me eager for more. Here is my plan for the week ending March 15, 2013:

1) Pictorial Painting

a) Watch the next lesson.

b) Begin the next lesson.

2) Express Your Love

a) Do whatever assignment Leah comes up with next.

b) Finish quilting the hair.

c) Finish the Iris Still Life by binding it and adding a sleeve.

3) Reflection (Absolute deadline April 23, 2013)

a) Finish quilting the ice and water surrounding the geese.

b) Start work on the red branches.


Friday, March 1, 2013

Week in Review 2013 - 03/01


I am fortunate to belong to SAQA and through SAQA have the opportunity to participate in the Visioning Project. Each fiscal year, running from October 1 - September 30 VP participants set a personal goal for the year. It seems ever since I started quilting in 1988 I have wanted more time to quilt. Then it hit me, why not make more time my VP project for 2013? I started practicing in September not answering the phone during studio time. I also notified family members that I would not be answering the phone during studio time, but would listen to messages during my breaks just in case there was an emergency. What a difference that simple change has made! You only have to look at what I accomplish each week to see what I can do by not answering the phone when working and committing to three studio days each week when I am at home.

The proof is in how the week ending March 1, 2013 went:

1) Shore's Edge (Absolute deadline March 21, 2013) - Made it with three weeks to spare!!

a) Attach the sleeves. - Done!

b) Make and attach the label. - Done!

c) Submit Call for Entry to Vivien at Fiber Revolution. - Done!

d) Add Shore's Edge to my website. - Done!

2) Pictorial Painting

a) Create a palette of colors to be used when painting the geese. - Done!

3) Express Your Love

a) Do whatever assignment Leah comes up with next.

An experiment with trapunto. The iris in a vase design is Hari Walner's.
I stole the rays from Express Your Love. I am thinking of
adding a single iris in alternate rays, then stippling around it.
Leah took a break from Express Your Love to work on a personal goddess quilt of hers. She wrote about how she is adding trapunto to the piece as well as how and why she opted to dye the over 60" square piece midway through the quilting process.

A closer look at the trapunto practice piece. It began as a
white whole cloth quilt. I immersion dyed it with minimal
stirring, hence the mottled look. 

I have been deliberating about adding trapunto to Reflection as a way to give the geese more of a 3D appearance. I used Leah's break from Express Your Love to do what she did, some trapunto followed by dying a whole cloth quilt, just on a smaller scale. The piece, with a working title of Iris Still Life is going to be approximately 16" square, unless I am inspired to continue with it by adding quilt as you go borders or blocks.

4) Reflection (Absolute deadline April 23, 2013)

a) Finish reverse appliquéing the geese to the background. - Done!

b) Paint the geese. - Done!

I painted the geese and then painted the lightest and darkest sections again in order to achieve a more natural contrast.


Reflection after the gees have been painted.
The red branches's location has been penciled in.

c) Determine how best to create the red branches and their foliage. - Done!

I have decided to create the red branches with skinny tubes of bias fabric. This method is frequently used when making Baltimore Album quilts to weave baskets or add vines and stems. I am going to embroider the foliage, probably in french knots done in clusters.

Now, what trouble can I get myself into before March 8, 2013?


1) Pictorial Painting

a) Watch the next lesson.

b) Begin the next lesson.

2) Express Your Love

a) Do whatever assignment Leah comes up with next.

b) Finish quilting Iris Still Life.

3) Reflection (Absolute deadline April 23, 2013)

a) Add the first layer of batting needed to trapunto the geese and trim it.

b) Add the second layer of batting and backing, in other words make the quilt sandwich.

c) Start quilting the ice and water surrounding the geese.

Tips, Techniques and Thoughts...

Last week Quilting Jenny made the following comment on my post:

"I would like to start laying out my project steps in this way and hope to get more accomplished. You seem to have a very good grip on your process and what is required at every stage."

The one word response to this comment is PRACTICE. I have been a quilter since 1988 and an artist with fabric as my medium since 2000. I have no idea how many quilts I have made, but since I make approximately six quilts each year I have made close to 150 quilts.

One thing I have doing since defining myself as an artist is beginning my day with morning pages or journaling. I do this 365 days a year, on weekends, while vacationing and even when I am sick. Morning pages are uncensored stream of conscientious writing done in long hand, not on the computer. I have found many benefits from this practice. One of the first things I noticed is that I got the whining out in private. I gripped about the weather, my health, my relationships with others, whatever had my hackles up. Getting it out there allows me to let it go. As time went on, I discovered that problems I was working on, such as how to make the red branches in Reflection, were often solved while I wrote. Sometimes I even doodle. That is how I created the free motion quilting pattern I will use on the ice in Reflection.

If you are interested in learning more about morning pages or making the transition from quilter to artist, I can't recommend "The Artist's Way" by Julia Cameron highly enough. I use it as one of the textbooks for my one on one mentoring class titled "How to Make An Art Quilt."


Friday, February 22, 2013

Week in Review - 2013 - 2/22

To borrow from Garrison Keillor, it has been a good week in my studio. Here is why.

1) Shore's Edge (Absolute deadline March 21, 2013) - made the deadline with 4 weeks to spare. I can now submit Shore's Edge for consideration in Fiber Revolution's exhibition, "Breadth." It will need to make the first cut by "Breadth's" Fiber Revolution curator and then a second cut by the curator for the Manifest Gallery in Cincinnati, OH. Eventually this will be a touring exhibition.

"Shore's Edge" is bound!

a) Create the binding and sleeves. - Done!

b) Start to attach the binding. - Done! Not only did I start the binding, I finished it.

2) Pictorial Painting

Seta Color Paint Matrix
Each of 8 colors are blended with each other.
The goal (which I didn't figure out until 25% through
the project) was to blend two colors twice, once so that color A
dominates and then again so that color B dominates.

a) Continue to work on my paint mixing matrix. - Done! I finished this, too.

This was a very time consuming project, but well worth the effort. Now, when I blend paint for future projects, such as the geese in "Reflection" I can refer to the matrix as a starting point. For example, I have already identified that I will use violet with a few drops of black for the darkest section of the geese, their necks.

3) Express Your Love

Detail from "Express Your Love" showing the latest
addition of a ray quilted with Flying Geese. It is the one
in the center with triangles flying south.

a) Do whatever assignment Leah comes up with next. - Done!

"Express Your Love" as it looks today.

The assignment was to quilt some rays using an assisted free motion quilt pattern called Flying Geese. It is an assisted pattern, because unlike most free motion quilting that is done with no marking, Flying Geese requires a few marked lines in order to stay on track. I was pleasantly surprised by how rapidly and easily this pattern worked up. I am left wondering where else I could use it. Perhaps in a geometric, abstract piece for some interesting secondary design.

4) Reflection (Absolute deadline April 23, 2013)

"Reflection" after the central cluster of geese have been added.

a) Finish reverse appliquéing the geese to the background. - OK, almost done. I have one goose and her reflection to go. She will be in the lower left corner and therefore will help balance the piece.

b) Mark where the red branches will be. - There is always next week.

Speaking of next week, here is my plan for the week ending March 1:


1) Shore's Edge (Absolute deadline March 21, 2013)

a) Attach the sleeves.

b) Make and attach the label.

c) Submit Call for Entry to Vivien at Fiber Revolution.

d) Add Shore's Edge to my website.

2) Pictorial Painting

a) Create a palette of colors to be used when painting the geese.

3) Express Your Love

a) Do whatever assignment Leah comes up with next.

4) Reflection (Absolute deadline April 23, 2013)

a) Finish reverse appliquéing the geese to the background.

b) Paint the geese.

c) Determine how best to create the red branches and their foliage.

This week's bonus is my recommendation to check out the talented artists I am privileged to work with as part of Fiber Revolution.


Friday, February 15, 2013

Week in Review 2013 - 02/15

One thing is becoming abundantly clear since I started posting my plans for each week and how they overlay with what I actually do, there is always a discernible difference. Sometimes the difference is small, but more often than not it seems as vast as the Grand Canyon. Is this a bad thing? Not necessarily. Therefore, this week's thought is a reminder to stay flexible, especially when creating. If something isn't working, find a way to fix it or just get rid of it and start over. If one thing leads to another, go with the flow. Listen to your inner voice. Learn to trust it. Find a way to balance staying in the moment with reflecting on all that has been accomplished to this point and then look to future for motivation to continue.

I accomplished much this week, just not what I thought I would. Here is how the week ending February 15, 2013 played out:

1) Shore's Edge (Absolute deadline March 21, 2013)

"Shore's Edge" is 30" H x 46.5" W
The sea foam and spray is added.


a) Fuse the sea spray (Angelina Fiber creation) to the quilt. - Done!

b) Start adding a scattering of beads to the foam and ocean to indicate bits of foam and spray. - Done!
However, if you are looking for beads indicating foam and spray you won't find them. Here is what I tried...

i. Securing the Angelina Fiber creation down with beads. Rejected.
ii. Securing the Angelina Fiber with Steam a Seam 2 Lite. That worked for the spray but not the lead edge and crests of the mini waves.
iii. Tried couching yarn. - Rejected
iv. Tried satin stitch. - Rejected
v. Tried braiding the yarn and then stitching it into place. Finally! Even this was problematic as I fiddled with different quilting feet to find one that wouldn't jam. I ended up using my open toe foot.
vi. I also tossed white and crystal beads around the ocean in strands and clusters but they looked like beads and not spray. So, no need to bead.

2) Pictorial Painting

The set up of paints in my wet studio (doubles as a laundry room).

a) Add the label to the Calla Lily piece. - Done! 

b) Watch the introduction for the second and final project in the class. - Done! However, it turns out that there is a bonus section on how to mix paint in the middle. So, what I really did was watch the instructions for the bonus section and not the final project. 


c) Gather the materials together to begin the final project. - Done! See above. 

Let the paint mixing begin. Seeing what happens when paint
is mixed and applied to muslin vs. a print.

What I worked on was creating a matrix of what happens when you blend the paints Mickey Lawler uses as a her base paints in SkyDyes. Being the over achiever that I am I couldn't resist creating the matrix on white muslin as well as a print. The left hand column and the upper row represent the paint before it is blended. I didn't catch on until I blended the yellow with the violet that I was supposed to blend them so that in the row the yellow dominates and in the column the violet dominates. Oh, well... You can see that I have two stripes of each color in square. The one on the left side is undiluted paint. The stripe on the right has been created with paint diluted with water at 1:1. Annette Kennedy recommends using the paint full strength. The reason becomes obvious when you look at the matrix. The watered down paint tends to travel a little bit and form a darker edge. Of course this could be advantageous if that is what you need.  

3) Express Your Love

a) Do whatever assignment Leah comes up with next. - Leah was busy filming for her latest Craftsy.com class and didn't post an assignment this week. Her newest class isn't available yet. However, her first class on Craftsy.com is. I can't emphasize enough how much I learned last year by following along with Leah. I missed my excuse to do some free motion quilting.

4) Reflection (Absolute deadline April 23, 2013)

The work on "Reflection" begins in earnest.
It is tempting to leave just the one goose. 

a) Continue to experiment with painting the geese. - What I did instead was learn more about mixing paint. I will tackle painting the geese after I have finished the paint mixing segment.

b) Develop a way to incorporate the painted geese into an artwork that references but does not replicate the original photo that is its catalyst. - Done! What I decided to do is print out the photograph in segments that could be seamed together. Then I am reverse appliquéing those geese I want included in the quilt to the background of ice. I still plan on painting the geese and enhancing the paint with some stitching. 

What on earth will I be up to for the week ending February 22, 2013? Perhaps this plan will work:

1) Shore's Edge (Absolute deadline March 21, 2013)

a) Create the binding and sleeves.

b) Start to attach the binding.

2) Pictorial Painting

a) Continue to work on my paint mixing matrix.

3) Express Your Love

a) Do whatever assignment Leah comes up with next.

4) Reflection (Absolute deadline April 23, 2013)

a) Finish reverse appliquéing the geese to the background.

b) Mark where the red branches will be.


Friday, February 8, 2013

Week in Review 2013 - 02/08


This photo is the inspiration for my newest WIP - Reflection.
It was taken early in the winter when the lake that borders our
condo had frozen and then started to thaw. The canada geese
are standing on ice coated with a thin film of water. This photo
like and photos of my work are taken by my husband, Dana Eagles.
This week has felt like one step forward and two steps back. I did make progress, but much of the week was spent on experimenting, rejecting the experiments or only being able to take them so far because I needed supplies that I don't keep on hand.

Once again, my plans and what got accomplished diverged. Here is how it went:


1) Shore's Edge (Absolute deadline March 21, 2013)

Let the experimentation begin! Testing whether eyelash yarn
trapped in Angelina Fibers will make a good sea spray.

a) Finish the beading on the beach panel. - Done!

b) Start adding a scattering of beads to the foam and ocean to indicate bits of foam and spray. - Done, BUT I am thinking of removing them and starting over. I felt the foam was too static as pieced and the crystal and cream beads just didn't look like spray to me. So, what I decided to do was play with adding more movement and sparkle to the foam by using Angelina Fibers. It took multiple attempts of playing with the amount of fiber to use and what to entrap within the fibers before I was satisfied. I don't want to stitch the Angelina Fiber creation in place, because I don't want to add much more stitching to the area or have stitching show. I thought that by scattering beads across the Angelina Fiber spray this would secure and enhance it. It really doesn't do either well. So I am waiting for some Steam a Seam Lite to arrive so I can fuse the Angelina Fiber creation in place then add beads more as droplets than fasteners.


Calla Lilly is bound
and the sleeve added.


2) Pictorial Painting

a) Quilt the Calla Lily practice piece. - Done!

b) Bind it. - Done!

c) Make and attach the hanging sleeve and label - Half done. The sleeve is on, but I haven't created or stitched on a label.


Detail to show the quilting used.
3) Express Your Love

The "Boomerang" rays are the two that run from lower
left to upper right. One Concentric Circle ray starts at the
Goddess's neck and its partner faces it.


a) Finish the final ray I plan to quilt using the Boomerang stitch. - Done!

A closer look in order to better see the quilting.

b) Do whatever assignment Leah comes up with next. - Done! The assignment was an old design updated called Concentric Circles. I had lots of fun with this one.

4) Reflection (Absolute deadline April 23, 2013)

a) Determine how to best add the geese to the quilt. - Started experimenting, but still am pretty clueless about how I should proceed. For now I am just letting ideas percolate and testing this or that.

I selected a section of the image to play with.
Next I printed on fabric. Finally I enhanced the
image with paint, based on what I am learning
in the Pictorial Painting class.


b) Start adding the geese. - I may never add the geese to the original background. I am still at the playing phase.

With so much in flux this is how I see the week ending on Friday, February 15th shaping up:


1) Shore's Edge (Absolute deadline March 21, 2013)

a) Fuse the sea spray (Angelina Fiber creation) to the quilt.

b) Start adding a scattering of beads to the foam and ocean to indicate bits of foam and spray.

2) Pictorial Painting

a) Add the label to the Calla Lily piece.

b) Watch the introduction for the second and final project in the class.

c) Gather the materials together to begin the final project.

3) Express Your Love

a) Do whatever assignment Leah comes up with next. - Done!

4) Reflection (Absolute deadline April 23, 2013)

a) Continue to experiment with painting the geese.

b) Develop a way to incorporate the painted geese into an artwork that references but does not replicate the original photo that is its catalyst.

Tips, Techniques and Philosophy:

If you are curious to learn more about Angelina Fibers or just need a refresher course, this YouTube clip of Ellen Anne Eddy should get you started on your quest.


Friday, February 1, 2013

Week in Review 2013 - 2/01


A hint of what is to come.
 I zipped along this week.  It feels good to be hitting my stride with my art work. Everything seems to be pulling together with ease and joy. Although I didn't do everything I set out to do during the week, I made a conscientious decision to revamp my goals in a more logical manner. The amount of work completed was the same or more than I planned, just with a slight diversion from the plans.

Here is what I had in mind and how I differed from the plan for the week ending February 1, 2013:


1) Shore's Edge

a) Finish the beading on the beach panel. - Started.

b) Seam the beach panel to the ocean panel. - Done!

The Ocean and Beach panel are joined
using the quilt as you go method.

c) Appliqué the foam panel to the quilt. - Done!


Next comes the foam.
d) Add a scattering of beads to the foam and ocean to indicate bits of foam and spray. - Opted to save this for next week.


Let the beading resume. Note how the shell and sand
beading under an inch of ocean are paler in comparison to
the shells nestled in the sand.

Detail of the painting of the flower.
The Calla Lily is painted.
2) Pictorial Painting


a) Watch the segment on how to paint the flower. - Done!

b) Paint the flower. - Done!

Although I am blown away by what I was able to accomplish, I can't help but be aware of how much more practice would be needed to choose a subject to paint and execute it without guidance.


3) Express Your Love

The golden rays are created with McTavishing. The upper
right corner red ray is done in my version of Boomerang. The
remaining red rays were quilted using micro zippling. Note
that the same red variegated thread was used for all three rays.
a) Finish McTavishing the final six rays. - Done!

b) Do whatever assignment Leah comes up with next. - Nearly Done.

Leah came up with two assignments this week. One was to quilt some rays using micro zippling. The other was to quilt some rays in the Boomerang stitch. Zippling is like stippling, only instead of meandering curves the quilting line is straight with angles to help with turns. I didn't do the Boomerang stitch. For some reason my hands naturally made triangles - so I stuck with that while following the flow of Boomerang. The final product is similar in thread build up do to travel stitching.

4) Not part of the original plan for the week is my Canada Geese quilt with the working title of Reflection - Pieced the background.

My plan for the weekend February 8, 2013 is to:


1) Shore's Edge (Absolute deadline March 21, 2013)

a) Finish the beading on the beach panel.

b) Start adding a scattering of beads to the foam and ocean to indicate bits of foam and spray.

2) Pictorial Painting

a) Quilt the Calla Lily practice piece.

b) Bind it.

c) Make and attach the hanging sleeve and label

3) Express Your Love

a) Finish the final ray I plan to quilt using the Boomerang stitch.

b) Do whatever assignment Leah comes up with next.

4) Reflection (Absolute deadline April 23, 2013)

a) Determine how to best add the geese to the quilt.

b) Start adding the geese.

Tip/Technique/Philosophy - thought for the week:

If I were to be diagnosed with OCD it would stand for Organizational Compulsive Disorder. It's true - my spices are shelved in alphabetical order with the labels facing forward. My fabric stash is folded, scraps are nestled within their matching folded fabric and the bundles are shelved by hue and then value. I bring the same OCD to my computer files. A common way for me to begin a file's name is with  the date. The system I use is the "Gregorian big-endian starting with year (Year-Month-Day). In this format the most significant data items is written before the lesser data items i.e. year before month before day." (Reference Wikipedia) Today's date would be 130201. For Leah Day's project today's picture can be found under Documents:Quilt Related Files: Leah Day 2013:Express Your Love: 130201 Express Your Love. This way all my files for a quilt project begin with the earliest work and end with the most recent.